Developed by Alice Wang and Jordan Mecom.
View the repository here.
Texture synthesis is the process of generating a larger texture image from a smaller source image. This project generates textures using an idea called image quilting, developed by Alexei A. Efros and William T. Freeman in their SIGGRAPH 2001 paper called Image Quilting for Texture Synthesis and Transfer. The idea is to stich together a larger texture from blocks (size specified by user) sampled from the source texture. To generate seamless textures, blocks are first selected such that they agree with their neighbor along some overlapping region. Then, the overlapping region is cut to minmize the sum of squared differences.
Texture transfer is a similar problem in which a taget image is rendered using a source texture. This algorithm follows the same process as texture synthesis, but with the additional constraint of having each block match a target image using some correspondence map. Often, the map is the luminance of the target image. The final image retains the low frequency details of the target image but it composed of the texture instead.
Approach and Algorithm Analysis
Texture Synthesis
Past texture synthesis algorithms create the new texture pixel by pixel, but Efros and Freeman noticed that most pixels are essentially predetermined by the pixels chosen previously. Instead, textures should be generated with larger units, which we will call a block.
The algorithm selects a random block for the top left corner. For each new potential block that can placed next, we evaluate the error between the overlap of the existing and new block. The error is evaluated using a simple sum of squared differences. The block is randomly selected amongst the blocks who are within some user defined margin of the best matching block. Randomly choosing the block in this way prevents the same block from being repeatedly chosen. This process continues until the entire desired output image is filled up.
Psuedo-code demonstrating the algorithm is below
for i = number of rows to fill
  for j = number of columns to fill
    if i==1 and j==1
      choose a random block
    else if i==1    # first column
      for each possible block in source image
        evaluate top edge overlap error
    else if j==1    # first row
      for each possible block in source image
        evaluate left edge overlap error
    else
      for each possible block in source image
        evaluate top and left overlap errors
  pick a random block out of set of potential matches
  perform minimum boundary cut
  place the chosen block in the output image
The runtime for the algorithm depends on size of the texture, desired output image, and block size. On a 2011 Macbook Pro, images around 125px by 125px, a block size of 20, and an output image size of around 250px by 250px takes on average 25 seconds to complete.
Our biggest challenge was understanding the best way to sample the blocks. We both assumed blocks from the sample texture were supposed to be regularly spaced. Instead, blocks can be taken from any point of the sample texture. This bug caught us up for about a day, but we easily finished this portion of the lab after fixing this error.
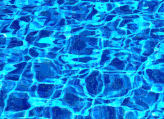
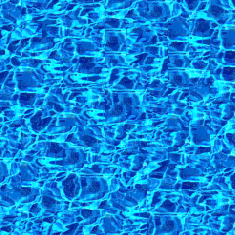
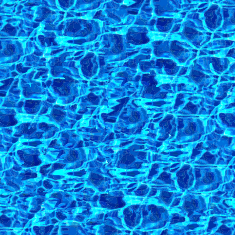
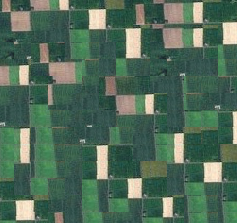
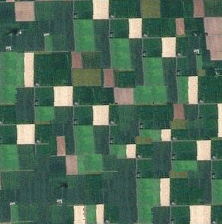
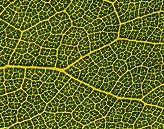
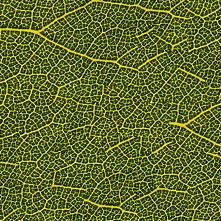
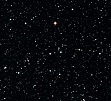
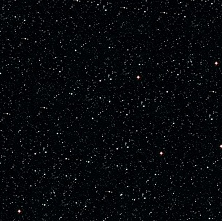
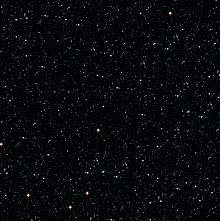
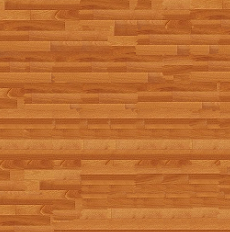
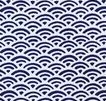
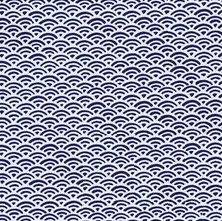
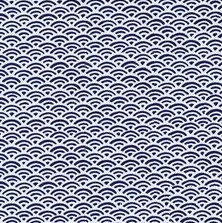
The results of our image quilting implementation are below. The original soruce texture is shown, followed by image quilting without the min boundary cut, and lastly by image quilting with the min boundary cut.
| Source texture | Without min-cut | With min-cut |
|---|---|---|
 |
 |
 |
 |
 |
 |
 |
 |
 |
 |
 |
 |
 |
 |
 |
 |
 |
 |
 |
 |
 |
The non-required images that we chose range from more stochastic (starfield) to uniform (Japanese wallpaper). The algorithm performs well on both cases. In particular, the min-cut version of starfield looks very good. We were curious how the algorithm would perform on this texture, as a compelling starfield shouldn’t contain obvious repetitions, which the output does not. In a way, the image quilted starfield looks better than starfields made by digital artists attempting to make a starfield look random.
Something else to note is that the non min-cut version of the Japanese wallpaper looks better than the min-cut version. The bottom right of the min-cut version has a noticeable seam between texels. This example shows that min-cut does not always improve the output.
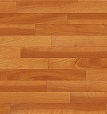
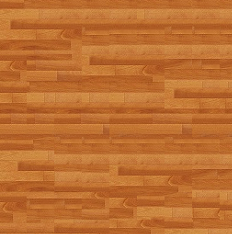
Lastly, the wood floor case shows that algorithm sometimes fails. The source texture contains a large, light colored plank throughout the middle. Thus, in the output that plank stretches across the whole image. Of course, this wouldn’t be the case in the original picture of the floor. To improve this result, a larger sample of the wood floor is required.
Texture Transfer
Similar to texture synthesis, texture transfer uses the block generation process to create the final image. The difference is that it uses an additional constraint for matching the correspondence map of the input texture to the target image. The correspondence maps, in our case, are the luminance maps of the target image and input texture (ie. the rgb2gray version of both images). An additional parameter, alpha defines how much to weight the tradeoff between making the output texture seameless, and keeping the result true to the target image. On average, texture transfer took about 3 minutes to run.
The results of texture transfer are shown below.
Source texture
Target image
Output image
![]()
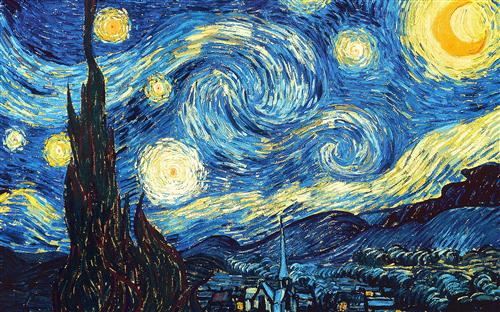
This example was inspired by the recent paper A Neural Algorithm of Artistic Style by Leon A. Gatys, Alexander S. Ecker, and Matthias Bethge. A similar example can be seen here. Clearly, image quilting isn’t as effective as more sophisticated approaches. Still, it’s interesting to constrast the two algorithms output to the same problem.
Source texture
Target image
Output image
![]()
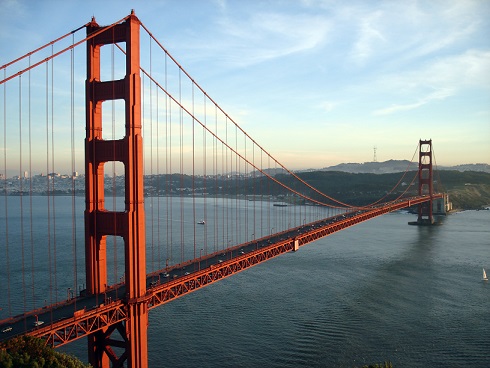
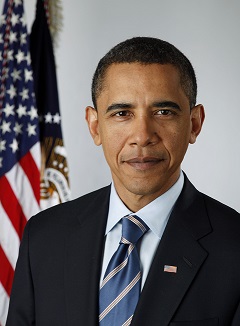
Texture transfer tends to perform best when there is a wide range of brightness in both the source and target. This example highlights that, notably around Obama’s suit and tie.
Source texture

Target image
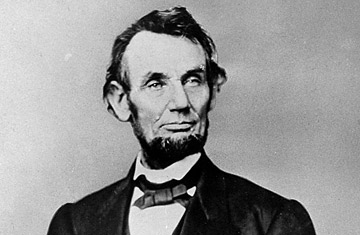
Output image
![]()
The background on the Abe Lincoln image shows the sensitivity to brightness that texture transfer can have. The left wall required a brighter yogurt patch, whereas the right didn’t - even though the wall should be the same, the lighting made the left and right sides look different in the output. This could be fixed using different parameters or correspondence maps.
In our opinion, this was the most difficult lab to implement so far. In light of this, we’d like to quote Efros from his paper: “[This] algorithm is trivial to implement” - I’m glad our struggle was appreciated.